Learn Crochet Color Work: A Beginner’s Guide
Today I want to show you how to do crochet color work! This super easy tutorial will give you the basics you need to know about any type of color work, and hopefully answer all your questions!
With the Mandala Pullover CAL in full swing, and the second part of the pattern going live tomorrow, I knew it was time to publish this tutorial! You can’t make the sweater without knowing color work. 😉
Before you freak out on me and change your mind about making the sweater…just breathe. Take a deep breath. Crochet color work may be different than you’re used to, but I promise it’s not all that difficult to learn. You’ll be rocking it in no time!
So, before we get into the nitty gritty, I want to start by answering some questions.
What are the types of crochet color work?
There are 3 main types of crochet color work: tapestry crochet, intarsia crochet, and fair isle crochet. They all are slightly different methods of doing color work, but the main goal is the same: to change colors as seamlessly as possible.
What will you show me in this tutorial?
In this tutorial, I will be showing you the very basics of crochet color work that you’ll need to know, regardless of which method you choose to use (tapestry, intarsia, etc.) I will also show you some of the differences between the methods of color work, and finally, give you some helpful tips along the way.
What method does the Mandala Pullover Use?
Let me be honest. Sometimes you can’t just follow ONE of the color work methods. When I do crochet color work, I usually combine the methods and use them interchangeably! The bottom line is, some of the methods work better for different parts of the Mandala Pullover. Once you get started on your project, (whether it’s this pullover or not) you’ll be able to get a feel for which method to use!
Please Share this tutorial by pinning it to your Pinterest Boards!

OKAY. Now that we’ve covered that, let’s get into the details of crochet color work! We will start by learning how to change colors. You will need to know how to do this regardless of which “method” of color work you’re using.
Changing Colors
Step 1:
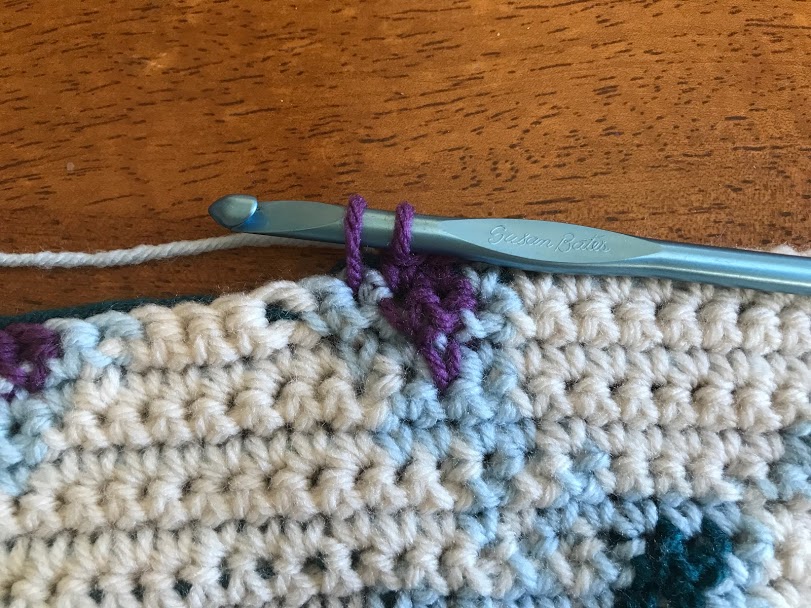
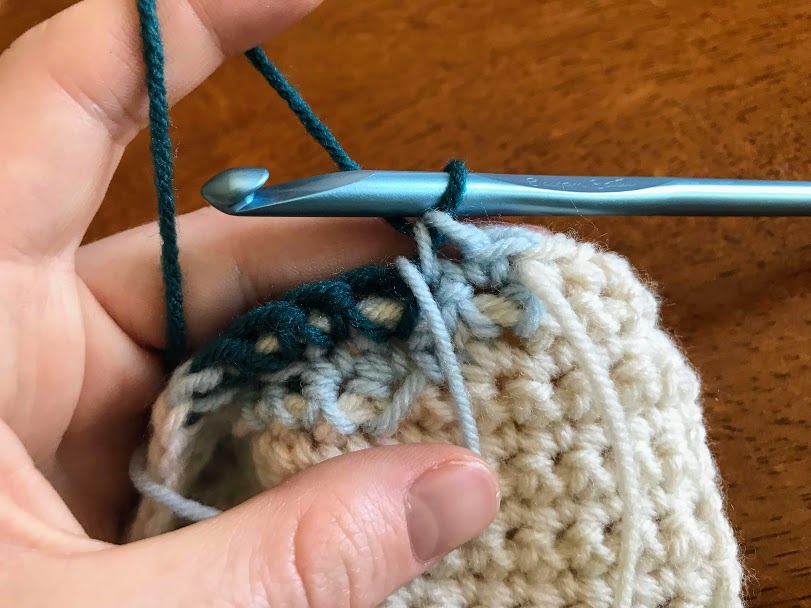
First, we need to know the most basic step in color changing: yarning over with a new color! In the photo below, you’ll see that I am working with the color purple. When I am ready to change colors, I will start the process 1 stitch before the new color begins. I will begin this stitch as usual: insert hook in next st, pull up a loop.
Step 2:
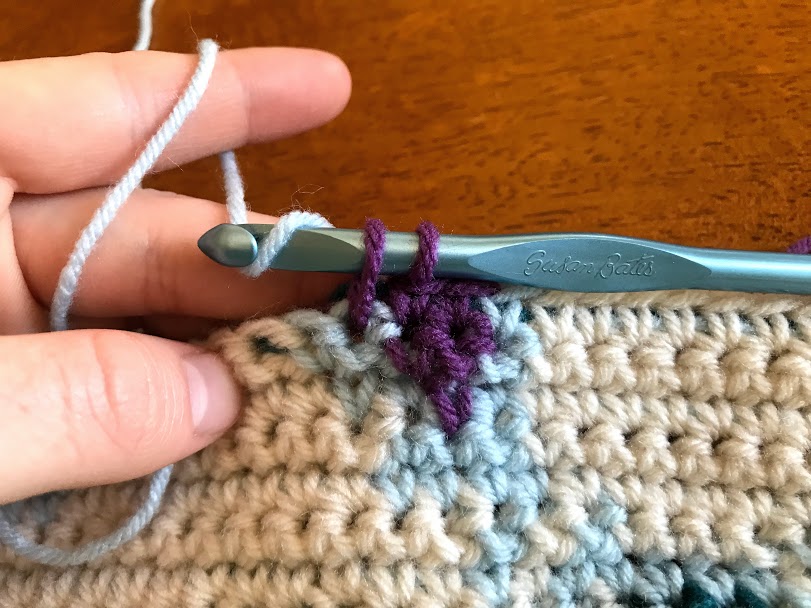
Next, YO with the NEW color (in my case, light blue). Pull through the 2 purple loops with the new color.
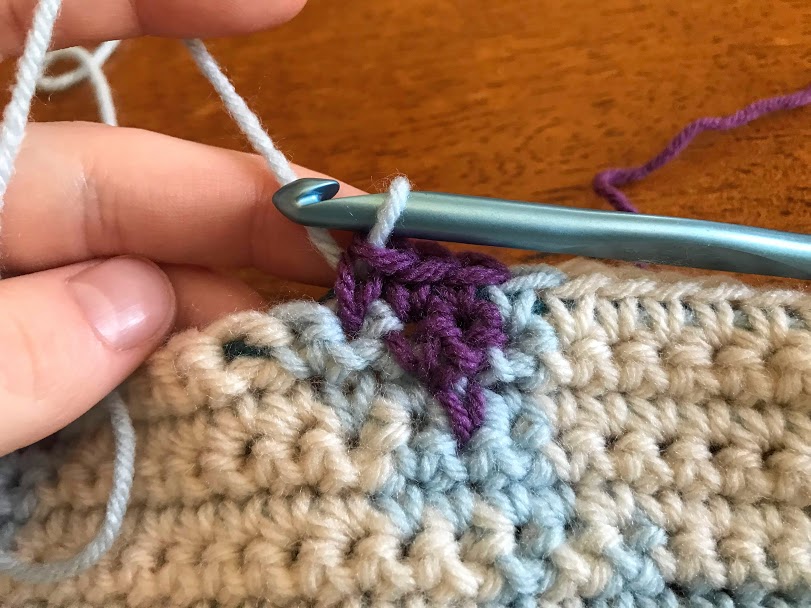
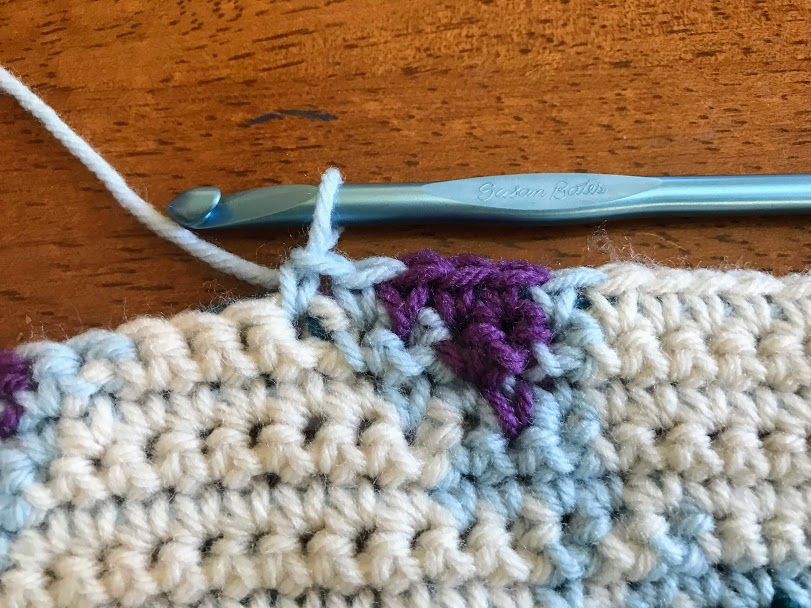
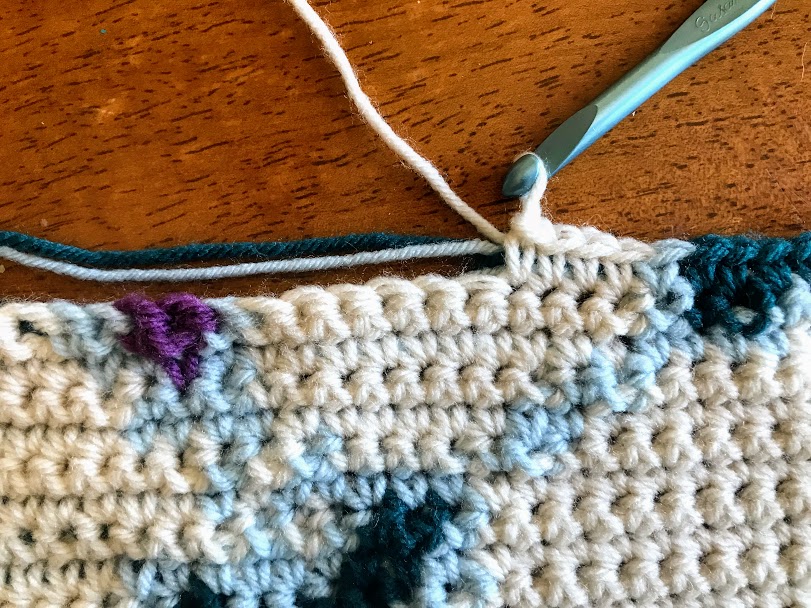
Now, simply continue with the new color! Note that on the RS, you will leave the unworked strand to the back of work, whereas on the WS, you’ll need to bring it to the front (shown in second photo below).
Carrying/Floating Colors
Once you actually change colors, there are several different methods of carrying the unworked colors across your work. You may need to use different methods at different times in an image (it can be different, for example, if you’re using only 2 colors versus 4).
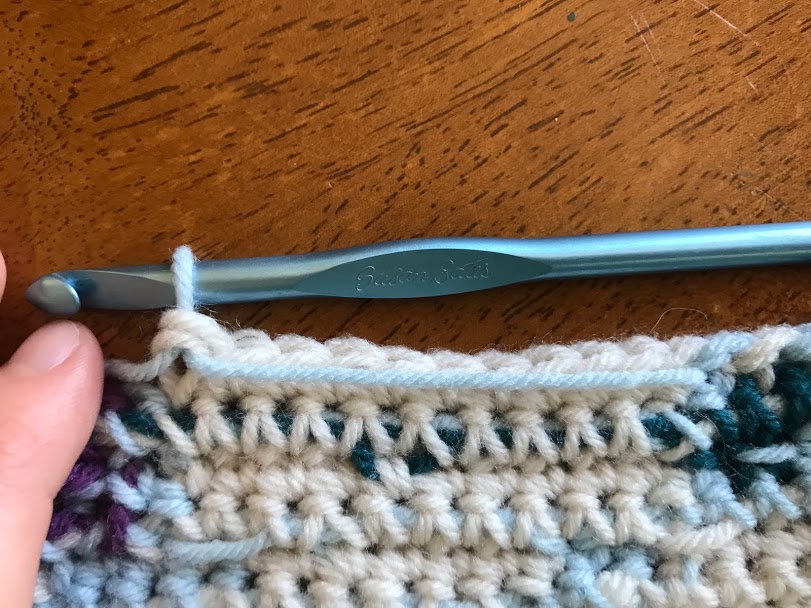
As a general rule, however, here is what I do with spare yarn. On any RS row, I crochet over the unworked strands, “carrying” them through my stitches until I need them again. This usually hides them well so that they’re not visible on the RS. On the WS, however, carrying colors throughout will be very visible on the RS, which we definitely don’t want. So instead, I use the “floating” technique. With this method, you will simply drop the unworked color until you need it again; then, pick it up. Simply use it to YO to change colors, while letting the unused part “float” across the back of the work.
Carrying Unused Colors
Floating Unused Colors
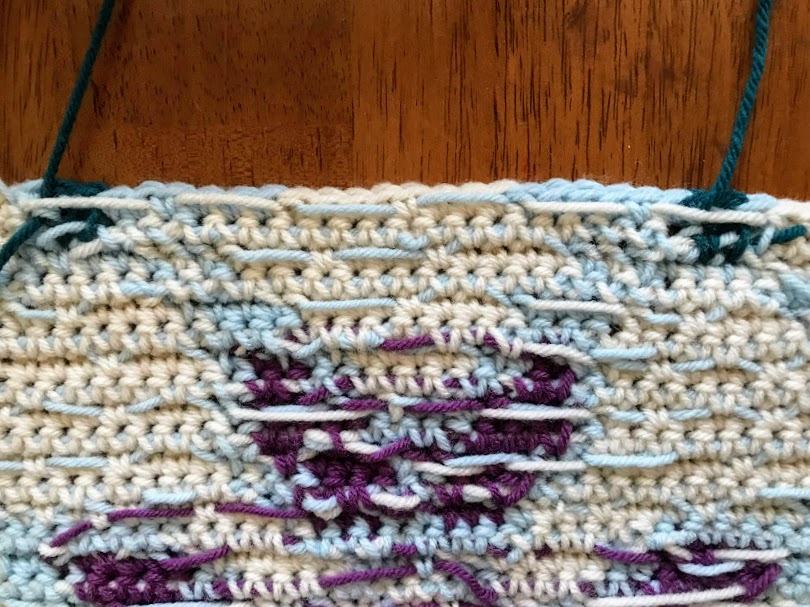
There is also a technique called Fair Isle. With this method, you do the “floats” but you do them over only a few stitches, and you do them on both the right and wrong side. This can reduce bulk in the color work; see photo below.
Fair Isle Crochet
For the Mandala Pullover pattern, I did a mixture of the tapestry method and fair isle method. When you get to the rows with all 4 colors, you will probably want to do small floats as in fair isle, because carrying all the colors throughout will get way too bulky. However, on rows with 2 or 3 colors, carrying them across works fine. You will get a feel for it when you start your color work, don’t worry!
Other Helpful Tips
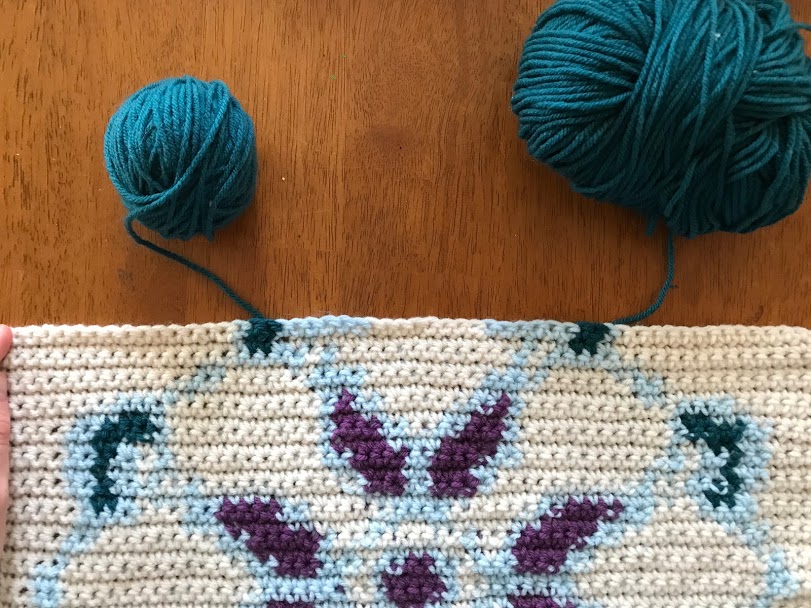
There may also be times when you need to separate the same color into 2 balls of yarn. This is because you may not want to carry the color all the way across a long row for just a few stitches. This is illustrated by the photo above—because the 2 teal sections are so far apart, I used two separate balls that I just had to pick up when I got to those colors. This also reduced bulk because I didn’t have to carry teal all the way across the row.
I hope this tutorial has taught you everything you need to know to get started with crochet color work! Be sure to view Part 2 of the Mandala Pullover so you can now put your knowledge into practice. 🙂
If you have any questions at all, please don’t hesitate to contact me.
To view all of my free patterns, click HERE. To get a special bonus straight to your inbox, sign up for my email list below:
Happy Crocheting!


Thank you so much for the amazing tutorial!
You are so welcome!😊